
How to create a Google Remarketing campaign
Why use remarketing ads?
We love remarketing campaigns; they’re a great targeted way to re-engage your future and current customers.
We’ve all seen it, you visit a website or interact with a Facebook promotion then all you see are ads for that website or product, suddenly they’re all over the web. This guide is for Google Remarketing (we’ll explain Facebook later).
Remarketing ads can help potential customers better understand your products or service but can also make your organisation seem a lot bigger and more relevant. They are very targeted, and when done well can be a very affordable way of converting leads to customers.
Remarketing ads can help potential customers better understand your products or service. We use them to provide additional information and help the viewer remember you even after they have left your website. They can give the impression that your service is both accessible and relevant and can encourage re-engagement.
They are very targeted, and when created well, they can be a very cost-effective way of generating leads and converting them to customers.
Speak to any ad exec, and soon you’ll start hearing about frequency and stats around how many times someone has to see your ads before they decide whether to buy your products. And it’s true the more familiar you are with something, the more likely you are to trust it and therefore engage with it. Remarketing ads let you keep showing your potential customers ads on an almost 1-1 basis, meaning there’s very little waste. Your only paying to show your ads to your customers (or at least website visitor)
They’re also an excellent way to get more out of your ad spend. If your driving strangers to your website, they might not interact on the first visit. Remarketing ads can keep you front of mind even when they’ve left the site.
However, I am sorry to say it’s not easy to set up.
So we have created this step-by-step guide to remarketing to see if we can help.
Disclaimer – We are not a media agency; we’re a customer experience agency. We don’t care how much you spend on Advertising. Advertising might not be the right choice for your business, and we can help you work that out. We help organisations connect with the right customers in the right way. Digital advertising is sometimes a piece of that puzzle.
When it is, it’s good to know how to do it.
Let’s Start with Google Remarketing.
Firstly you need to understand remarketing. There is no point in running remarketing ads that send users back to your website. They’ve been there already, they saw it and left, sending them back there for no reason is a waste of time and money.
So what to do?
What do we know about these visitors? We know they’ve been to your website. So maybe we can assume they went there for a reason related to your business. So give them a reason to engage.
For our business we want to connect so we can communicate with our customers and stay relevant. Maybe they don’t need our services today, but they might one day in the future. So we try and convert strangers to leads by offering content relevant to what we do, just like this report.
So we might run a series of ads offering reports and information relevant to our customers and our business.
We can create a landing page to collect some details in return for a report.
What you will need for Google Remarketing Ads
- A website/landing/Call-to-Action page to capture leads (much like this one Click to activate )
- A Google Adwords account (go here to get one – https://ads.google.com/intl/en_au/getstarted)
- An idea of what you want to say in your ads and an image.
- A credit card
- An active Google remarketing tag – please note this needs to be set up and you need to have over 100 website visitors before you can create your campaign. To find out more go to – https://support.google.com/google-ads/answer/2476688?hl=en-AU
Creating the campaign
In this example, we’ll show you how to create a remarketing campaign for this report ‘A Step-by-Step Guide to Remarketing’
So now you are ready.
- Login to your Google Adwords account
- If you are not in ‘Expert mode’ you need to be. Top right there’s a spanner if it just says ‘settings’ (instead of ‘tools and settings’) click it and select ‘Expert Mode’
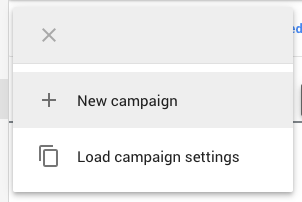
- Now click to campaigns and click the blue ‘+’ plus button to start
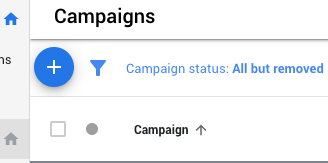
and select ‘New Campaign’
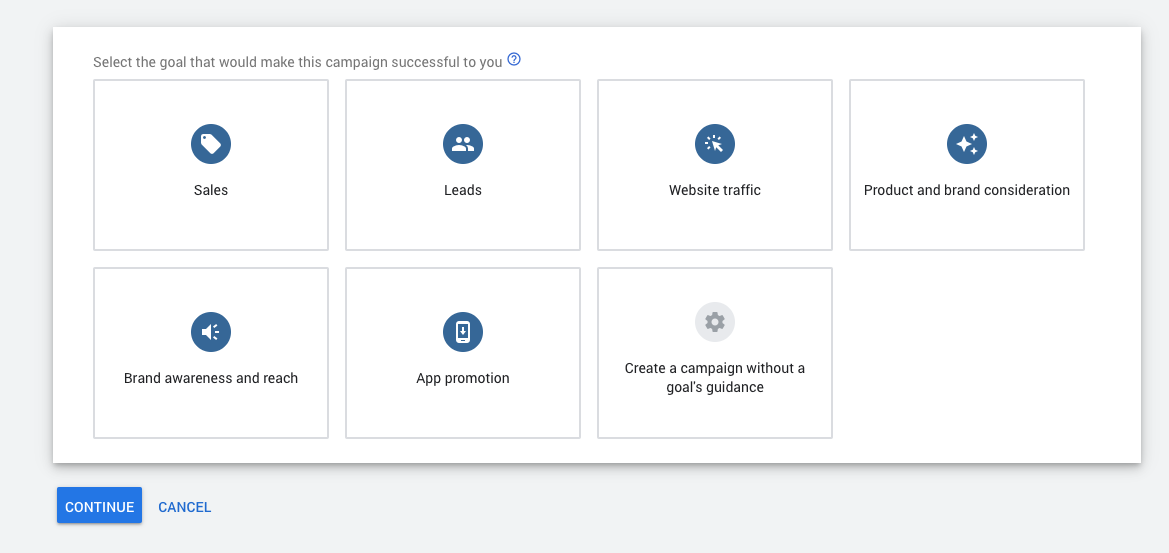
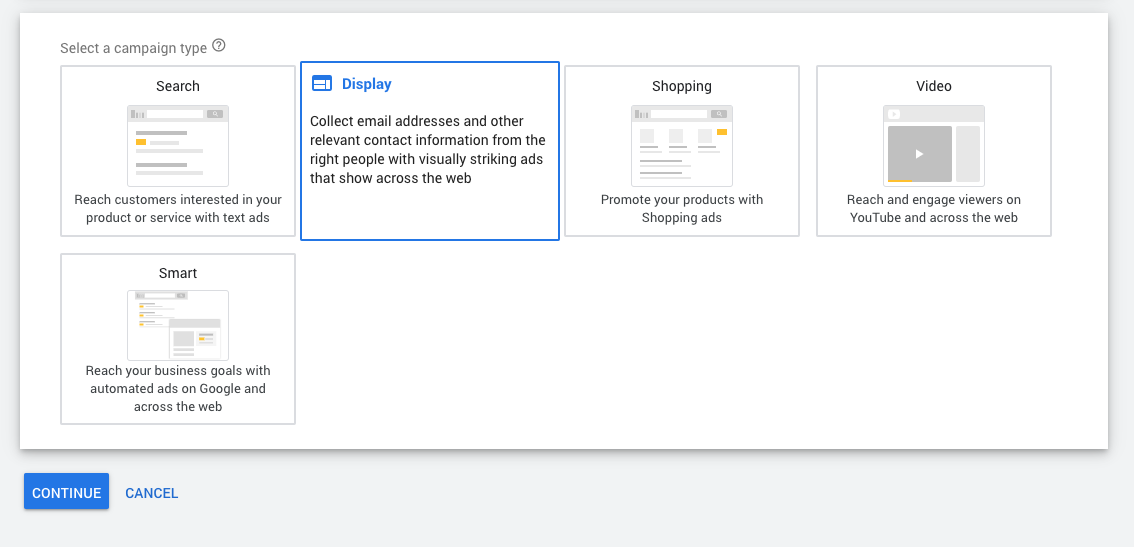
- Choose your campaign goal (We selected leads because we want leads)
- Now choose ‘Display’
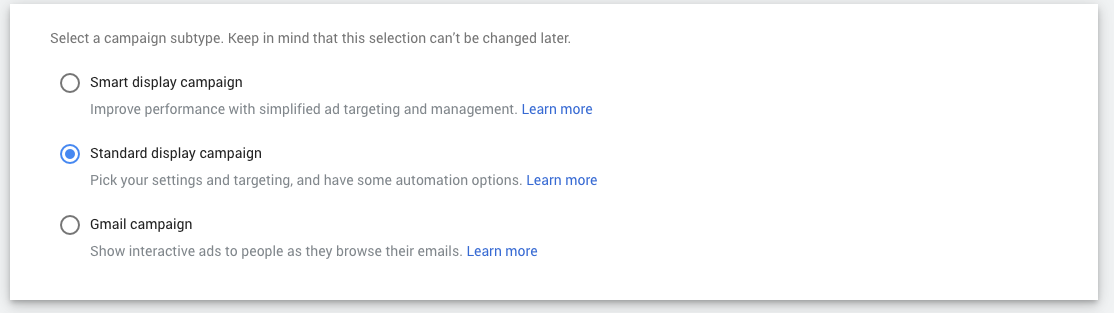
- No Choose ‘Standard Display Campaign’
- Add your destination goal (website page or landing page with your promotion to re-engage)
 Then click ‘continue.’
 - Give your campaign a name and make sure the location and language are right for your campaign. Also, select relevant bidding (we chose conversions and are happy to pay for clicks)
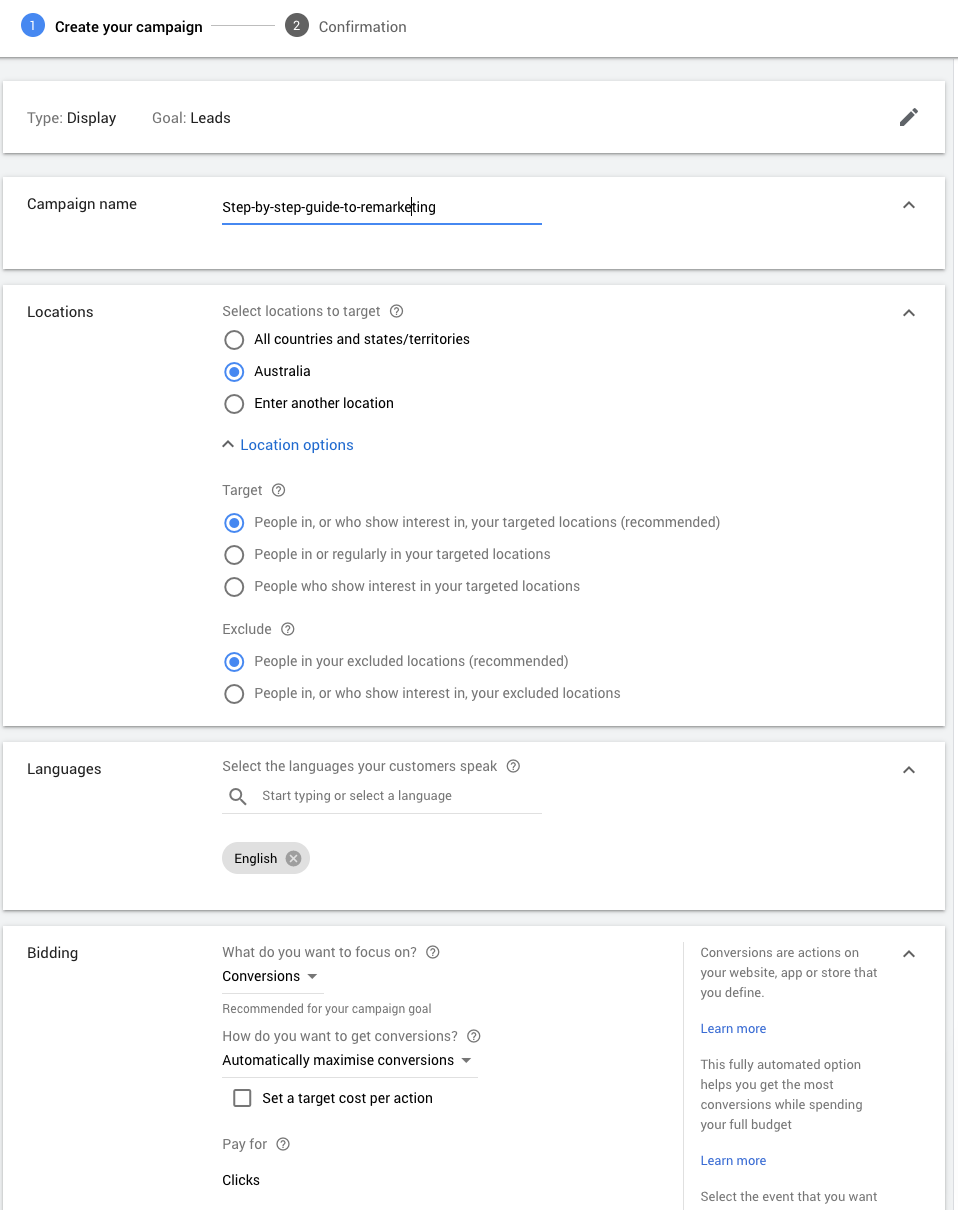
- Add a relevant budget, note this is a daily budget, so think about how much you want to spend per month (something you can afford), the good thing is your target audience will be defined by the number of people visiting your website.

- Give a name to the ad group – This is important you’ll need this later for your audience.

- Which came first the audience or the campaign? With Google Remarketing, you need an audience to remarket to, but you can’t connect the audience until you’ve created the ad. You will need to add the audience you have created with your ‘Google Remarketing Tag’ to the campaign; however, you can’t add it to the campaign until you have created the campaign. So initially just select any audience (you have to have one to publish the campaign) then we’ll come back and add our actual audience once it’s published.
- For demographics select what’s relevant, age, sex, etc – match it to your customers.
- For targeting expansion, it doesn’t matter because we’re only going to be targeting our website traffic.
- Now create your actual ads. Here are a few pointers:
- Have lots of heading and descriptors. Google will work out which perform better and optimise it for you
- Have descriptions and headlines that match your landing page – if they don’t, Google won’t show your ads as often.
- Choose engaging and relevant images again, the more, the merrier.
- And publish your ad – fixing any issues that are displayed
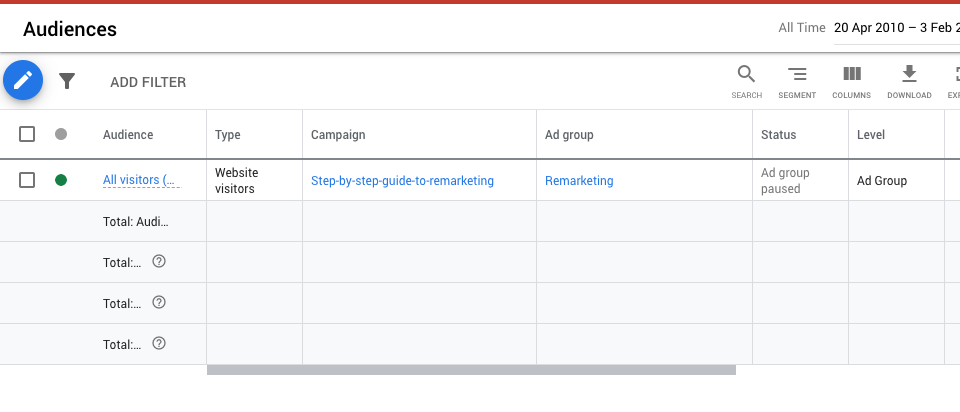
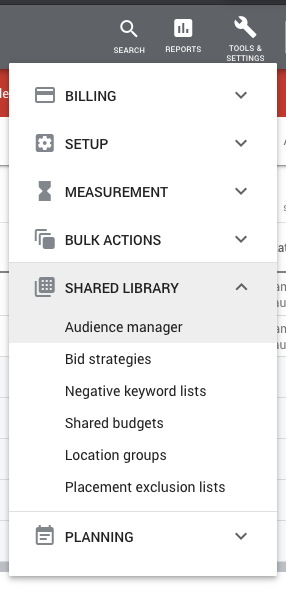
- Now you can add your audience. To do this click the spanner top right (tools & Settings) > then shared libraries > the Audience manager.
Select the ‘All visitors’ (or whatever you called the audience you created when you set up your remarketing tags) by ticking the little box to the left
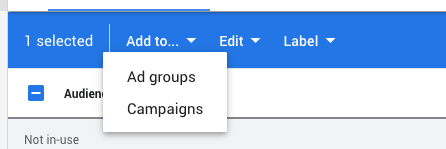
- In the blue bar that appears at the top choose ‘add to…’ and select ‘Ad Groups’
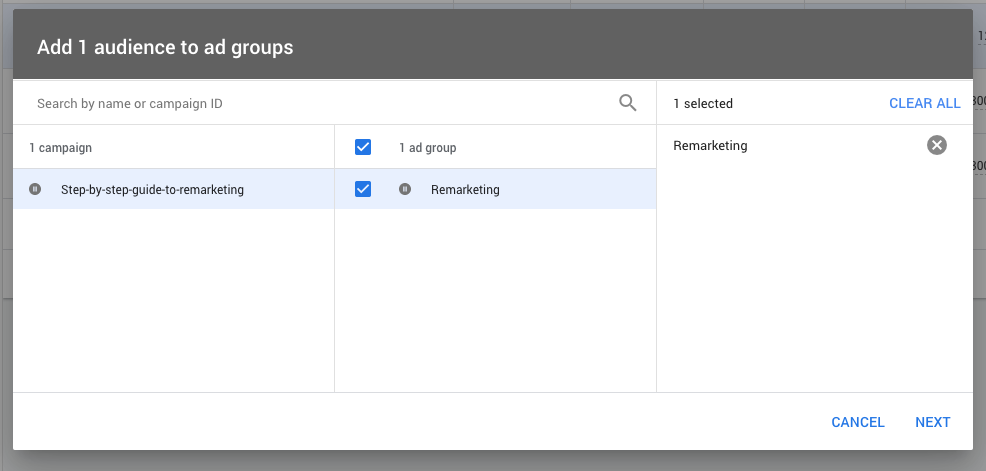
- Your Ad Group should appear under the campaign, tick the box next to it and then in the ad group column also tick your ad group and click ‘next’.
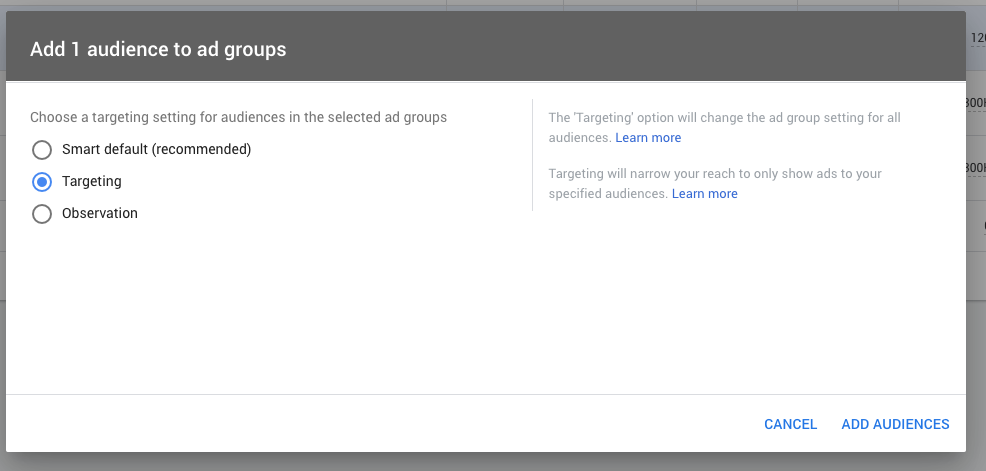
- Then choose ‘targeting’ from the radio buttons (this makes sure you are only advertising to your website visitors and no one else)
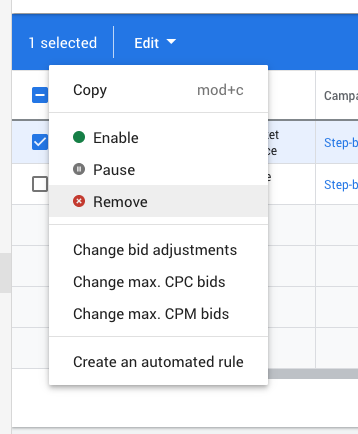
- Now you can return to your campaign. Click on the audience in the left nav. This should show two audiences for your campaign. The one you add in the ad set-up and the new targeted on you have just added. Click the green dot next to the none-targeted one and click the pause.
- Tick the box next to it, and from the drop-down edit, button click remove.
- Your audience should now be up and running to your targeted audience only.
- Now you can sit back and watch the leads roll on in